

Gator Patch Asphalt Repair


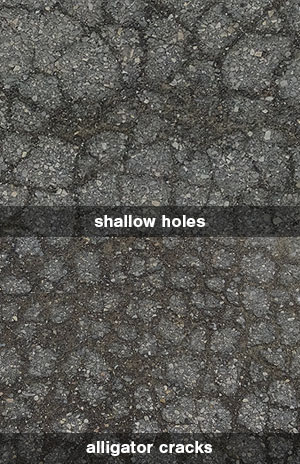
Fix alligator cracks, shallow holes, and cracks wider than 1/2". Save a lot when you buy 1/2 pallet or full pallets.
You get up to 100 sq ft of alligator patching per pail for contractors to have on hand for repairing gator cracks.
- Rescues asphalt riddled with cracks
- Leaves a smooth and even finish
- Only needs a squeegee to apply
Make It a Bundle
Have questions? We’re here to help!

Fixing Alligator Cracks Has Never Been Easier Thanks to Gator Patch
Gator Patch is a great all-around asphalt repair patch that is ready to use right out of the pail. Get up to 20 square feet of coverage per gallon for alligatored areas, and up to 150 linear feet of 1/2" x 1/2" cracks.
- Repairs severely decayed asphalt for less than cutting it out and replacing.
- Smooth, new-like finish.
- 3 to 4-year lifespan.
Repair Asphalt Alligator Cracks Easily
This simple alligator patch is an economical solution to heavily cracked asphalt. With this product, you no longer have to resort to a complete asphalt overlay or full replacement for multiple cracks. This product also doesn't require any heavy equipment; all you need is a squeegee for application.
How to Apply Gator Patch
Gator Patch is a "patch", not a crack sealant, and is temperature-sensitive as most asphalt emulsion-based formula products are. This easy repair process allows you to have your repaired areas traffic-ready in 2-4 hours, given favorable conditions. It is important to not use Gator Patch asphalt repair when precipitation is in the forecast. The same is true when the asphalt is wet, or when the temperature will be below 50°F.
Simply prepare your asphalt as you would for any other task: remove any dirt and debris from the surface. We recommend using our Asphalt Crack Cleaner Machine, Billy Goat Grazor, or Heat Lance to get the best results.
After ensuring the asphalt is clean and dry, you can begin to apply the patch. Simply mix/stir it as per instructions. Pour some of the repair material onto the cracked asphalt and spread it using a squeegee.
Remember not to spread the product too thick in one coat. Spread it in multiple layers. Otherwise, it will not always dry and cure out in a timely manner.
For wide cracks (1/2"-wide or more), make sure the patch is flush with the surface. You can do this by using a squeegee to remove the excess.
Weather and humidity play a tremendous role in the setup. Always check the constraints and procedures for applying our original Gator Patch asphalt repair.
What is Gator Patch made of?
It is made from petroleum asphalt, clay, water, and quartz silica (sand).
Petroleum asphalt, its main ingredient, acts as a binder. It is the same ingredient that we mix with aggregates to construct roads, parking lots, and driveways. It is also an important component in making roof shingles, floor tiles, and irrigation linings.
Clay and water make the patch spreadable, while sand adds to its volume. Biocide is added to stop the formation of mold. This component can also prolong its shelf life.
Protects Asphalt in All Climates
Once the patch is cured, it seals the asphalt against water and chemicals. It withstands any weather condition once cured.
We recommend sealcoating the surface once the Gator Patch has fully cured for improved durability. This product is compatible with coal tar asphalt sealer and regular asphalt sealer.
Protect from freezing.
After Use: Wash squeegee and all used tools with soap and water. If the product has dried on the tools, use a solvent.
To Store: Do not store Gator Patch in direct sunlight. Do not store in temperatures over 100°F. The container must be closed when the product is not being used. Keep out of reach from children.
Have questions? We’re here to help!
| Shipping Dimension | (x3 Pail) 48" x 36" x 22" |
| (Half-Pallet) 48" x 36" x 22" | |
| (Full pallet) 50" x 38" x 34" | |
| (x36 Pails) 50" x 38" x 48" | |
| Shipping Weight | (x3 pail) 200 lbs |
| (Half-Pallet) 760 lbs | |
| (Full Pallet) 1480 lbs | |
| (x36 Pails) 2100 lbs | |
| Note: Weights and dimensions are estimates. Actual values may vary slightly due to packaging and freight terminal scanning. | |
| Color | Black |
| Odor | Bland asphaltic |
| Weight per gallon @ 77°F. ASTM D1010, (lbs) | 9.60 ± 0.20 |
| Nonvolatile %, ASTM D2939 | 70.00 - 72.00 |
| Viscosity @ 77°F, ASTM D562 (Kreb's Stormer Unit) | 125 min. |
| Penetration (0.1 mm), ASTM D5 | Pass |
| Resistance to water, ASTM D2939 | No blistering, no re-emulsification |
| Ductility, 77°F 5 cm/min. cm., ASTM D113 | Pass |
| Flammability | Non-flammable |
| Shelf Life (yrs) | 1-2 |
| Cure Time | Dries for traffic in 2-4 hours in normal conditions; Cures completely in 24 hours. |
| Minimum Application Temperature | +50°F (DO NOT apply when rain or frost is forecast within 12 hours) |
| Application | Cold applied with squeegee |
| Clean-up | Water and soap. Use solvent for dried material. |
| Note | Coverage up to 20 sq. ft. for patching alligatoring areas and up to 150 linear feet of 1/2" x 1/2" depth cracks per gallon. (Coverage will vary, depending on size and frequency of cracks in alligatored areas." A second application of Gator Patch will give cosmetic benefits in terms of smooth, consistent appearance and virtually hiding the outline of the cracks in the alligatored areas. |
5
5 stars
82% (18)
4 stars
14% (3)
3 stars
0% (0)
2 stars
0% (0)
1 star
0% (0)
Share your thoughts with other customers
Top customer reviews
- very impressedExcellent communication and support were shown from the day the order was placed up to delivery. We are very impressed with Asphalt Kingdom!
- Good productI recommend
- AmazingI’ve used gator patch it’s amazing! The jobs I’ve used it on so far are still going strong!
And if it turns out not lasting it still looks better than not using it ( for those who can’t afford R&R) - I like the Gator PatchI like the gator patch and works really good
- Will order againThe product is really great and will order again in the next season.
- Happy with your productsI am a reseller and my customer is happy with your products.
- I like your productsI like your products and it works very well.
- Crackfilling and Sealcoating are really simpleEverything is fine. It took me a little bit of a learning curve. The videos on the website are really helpful for a starter like me. I realize that Crackfilling and Sealcoating are really simple. You just need to get the right equipment for you. I'm happy with my purchase looking forward to doing more business with you in the future
- It's worth Sharing!I'm satisfied with it. Great products. Everything that I've purchased works great! It's worth Sharing!
- More orders for Gator PatchI'm happy with it. It looks like it's still good so I'm looking forward to order more in spring.
- Gator Patch's working okayIt's working okay. The performance is good. All in all satisfied with the purchase.
- Product worked great...No complaints! The products works great. Very happy with it.
- I like the productI Like the product, It did what I expected it to do.
- It’s working !First time I ever used the stuff , I like it , started with 3 pails , bought 36 more pails from them . I like how it is working so far it looks good ! Going to seal coat over it
- PerfectPlaced my order and next thing you know it was at my office way before the time it was to be here. Very fast and prompt service. Will for sure be buying more from them.
- A+ companyA+ company……
- Top Shelf!I started Wyoming Asphalt Repair with Asphalt Kingdom equipment and material. I am very impressed with the how great the equipment runs and how great the material works. Their customer service and sales team is top shelf!!
- We will continue to use it yearly with hope that the product will be improved to adhere better through developmentGator Patch has saved our parking lot from total deterioration. Although its adhering capabilites could be better, generally it holds the sections together until the freezing and thawing. It is a good value for the price and works better than other product.
- Good crack fillGreat product! Fills in bigger cracks very well as stated!
- Went on easy, sticks out like a sore thumb.I followed all the instructions. Waited more than 48 hours to seal the driveway but the gator patch sticks out real bad. My customer was very disappointed. Not sure how to fix it.


Response from store
Thanks for your review, Bob. The texture will always be different than that of the pavement because it doesn't have any aggregate in it. Sealcoating after patching not only fixes the 'sore thumb' issue but it also helps to preserve the patch so it lasts longer. Is that an option for your customer? - ExcellentBest patch filler
- Good Product But Definitely NOT TrowelableI bought this to fix up some cracks and shallow depressions in my driveway. It did a great job BUT i had to use a squeegee to apply it. It is far too thin to stay on a trowel


Start your Asphalt Maintenance Business with the most in-demand service!
Looking at doing surface repair as a business? Make your success inevitable with these valuable add-ons, yours free with purchase at Asphalt Kingdom!
You get:
- Role-Playing Video with Judd Burdon: find out exactly what to say when you pitch your business to customers, and how to answer their most common objections.
- Crack Filling Proposal Template: a professionally designed form that you can fill in and print off — convert more business when you look pro from the get-go.
- Customizable Social Media Templates: swipe these great graphics and post them on your Facebook or Google My Business pages — get valuable leads with these proven templates!
- Phone Script written by Judd Burdon for you or your sales team to use when prospecting new business.
- Exclusive Access to AK Round Table Meetings: join us on a weekly Zoom call and get answers to any questions you have about your business.
You don't need to spend valuable time learning in the school of hard knocks — take advantage of the experience we've gained helping 1000s of clients start their own business.
Just click 'Make it a Biz' when you add this product to the cart, and we'll send you all of the above absolutely free. Welcome to your asphalt kingdom.
Additional value when you order this product:
| $375 | |
| $375 | |
| $425 | |
| $325 | |
| Priceless | |
| TOTAL VALUE | $1,500 |
Gator Patch is designed to fix alligator cracks on the pavement. To save money, apply Gator Patch only to the alligator-cracked areas, then sealcoat everywhere else for a uniform finish.
It is recommended to apply Gator Patch first, then apply the sealer. This adds additional protection and can extend the service life of the pavement.
Both coal tar emulsion sealers and asphalt-based sealers are compatible with cured Gator Patch.
Think of Gator Patch like peanut butter on toast. You want a smooth layer that covers the pavement and works down into the cracks, but not so thick that it’s all patch and no pavement.
For best results, apply multiple thin coats and let each coat dry before adding the next. Use a hard trowel or a stiff squeegee to spread it evenly across the surface.
Rubberized Hot Pour Filler is a better solution for this because it stays flexible due to its higher rubber content.
Rubber crack filler expands and contracts with heat and cold. Gator Patch does not have the same flexibility, so using it to fill linear cracks, especially working cracks, can cause the repair to fail and allow moisture and water to seep into the pavement’s foundation.
Yes, Gator Patch™ can be used to fill shallow depressions.
For depressions deeper than 1/4 inch, apply it in multiple thin coats, no more than 1/4 inch per coat, and allow each coat to dry thoroughly before adding the next.
Gator Patch is temperature-sensitive. When it is extremely hot, it reacts slower to cure as the humidity plays a major factor in the curing process. The heat also softens the gator film and tire marks will be present. After it cools down, the Gator Patch will harden.
Even with the hot weather, the Gator Patch will continue to absorb moisture from rain, and humidity for a short period of time.
We do not recommend applying the Gator Patch when there is a chance of rain as the asphalt will be wet and/or the temperature will be below 50°F.
Another factor is if the Gator Patch applied is thicker than the required specifications, it will also contribute to the slow cure time. It should be applied in multiple layers, as needed, to ensure that it dries and cures as quickly as possible.